Simple Sourdough Bread Recipe: The Joy of Homemade Bread
I remember the first time I baked my first sourdough. It was a bit of an adventure, really. I had my starter, my ingredients, and the hope that I wouldn’t mess it up too badly. The dough was sticky and a bit unruly, but as I watched it rise and take shape, I felt like a magician. There’s just something so satisfying about taking flour, water, and a bit of time and turning them into something so delicious. If you’re new to sourdough, don’t be intimidated. With a little patience and a bit of love, you’ll be baking beautiful loaves in no time.
So, grab your apron (or head over to my online shop for a new one) and let’s dive into the simple steps of making homemade sourdough bread. Trust me, you’ll want to bake this again and again!
Recipe: Basic Sourdough Bread
Let’s get to the heart of the matter: the recipe! Here’s what you’ll need to create this beautiful, crusty sourdough bread:
Ingredients:
- 200 grams active sourdough starter (the bubbly magic that makes your bread rise)
- 1 kilogram unbleached flour (I like a good strong bread flour, but use what works best for you)
- 650 grams water (lukewarm is perfect)
- 18 grams salt
Step-by-Step Guide: Making Sourdough Bread
1. Mix the Starter and Water
Start by grabbing a big bowl (the bigger, the better—trust me, you’ll need space for the dough to grow). In this bowl, combine 200 grams of your active sourdough starter with 600 grams of water. Stir it all together until the starter dissolves. It should look like a soupy mix, and that’s exactly what you want. Now, you’re off to a great start!
2. Add the Flour
Next up, pour in your 1 kilogram of flour. I know, it sounds like a lot, but trust me, it will come together beautifully. Stir until you no longer see any dry flour. This will give you a shaggy, sticky mess—and again, this is perfect! Don’t stress over the texture; it’ll all work out. Just give it a good mix until everything is combined. Then, cover the bowl and let it rest for an hour. This process is called autolyse (I know, sounds fancy, right?). It lets the flour absorb all the water and develop gluten, and sets the stage for a wonderfully soft dough.
3. Add the Salt and Mix
After your dough has had its rest, sprinkle in the 18 grams of salt. Mix it into the dough, and here’s the fun part: it’s going to get sticky! Don’t be afraid. This is where the magic happens, and your dough will slowly start to come together. Keep stirring until the salt is fully incorporated. The dough might seem a little rough at first, but that’s okay. We’re going to give it time to relax and rise.
4. Bulk Fermentation: Let It Rise
Now, cover your dough with a damp towel or plastic wrap and let it sit at room temperature for 4-6 hours. During this time, you’ll want to give the dough a few folds. Every 30 minutes or so, reach into the bowl, grab the edge of the dough, and fold it over itself. This helps strengthen the dough and gives it that lovely structure. Repeat this process about 4 times, and then let the dough rest for the remainder of the time.
5. Shape the Dough
After your dough has had time to rise, it’s time to shape it! Sprinkle some flour on your work surface and gently turn your dough out onto it. Carefully shape it into a round loaf by folding the edges toward the center and flipping it over. You can also shape it into a boule or a batard if you like—just play around with it! The beauty of sourdough is that it doesn’t need to be perfect; in fact, the imperfections give it character.
6. Final Proof
Now, let your shaped dough rest for another 2-3 hours. Cover it with a towel, and let it puff up like a cozy pillow. You’ll know it’s ready when it’s slightly puffed and feels airy to the touch. You can also do an overnight proof in the fridge for an even deeper flavor, but if you’re short on time, the shorter proof works just as well.
7. Bake It
Preheat your oven to 220°C (450°F) about 30 minutes before you’re ready to bake. If you have a Dutch oven, this is the time to use it. Place your dough into the preheated pot, score the top with a sharp knife (this helps it rise evenly), and pop the lid on. Bake the bread for 30 minutes with the lid on, then remove the lid and bake for another 15-20 minutes, until the loaf is golden brown and sounds hollow when tapped on the bottom.

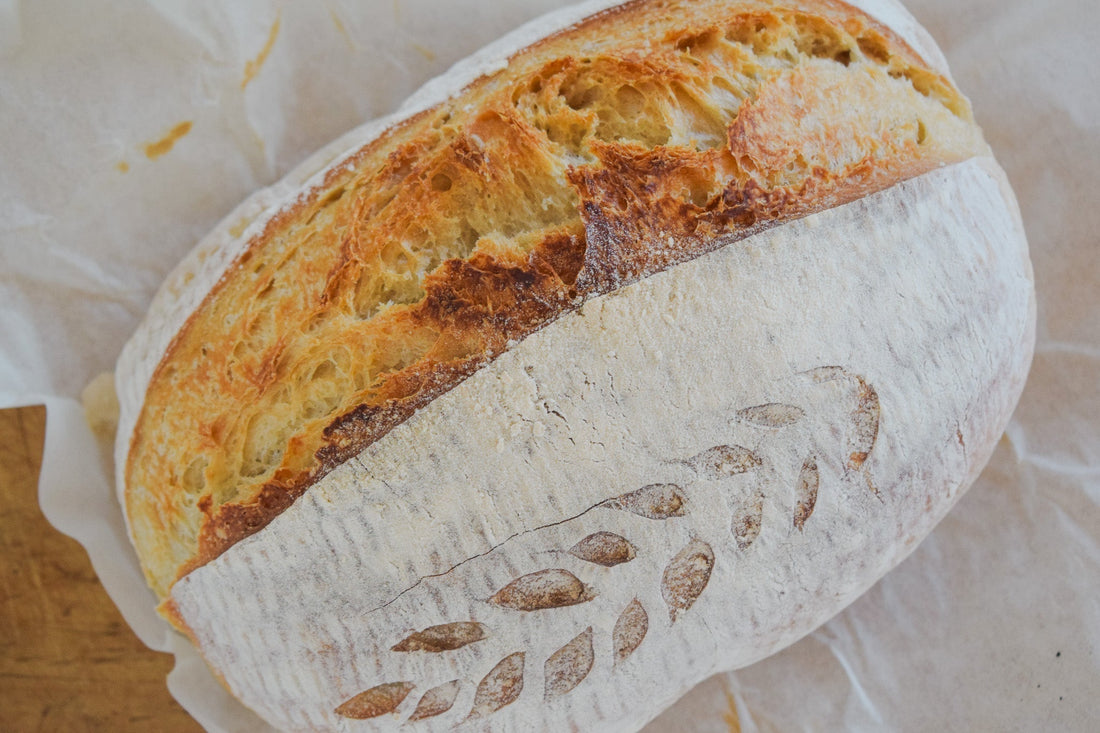
The Result: Beautiful, Crusty Sourdough Bread
Once your bread is out of the oven, try to resist the urge to slice into it right away (I know, it’s hard!). Let it cool for at least an hour to set the crumb. The result? A gorgeous loaf of sourdough with a crispy, crackly crust and a soft, chewy interior. When you slice it, you’ll be treated to that perfect balance of tangy flavor and comforting breadiness. It’s the kind of bread you’ll want to serve at every meal, whether it’s for a cozy dinner with family or a simple breakfast with butter and jam.
The Joy of Baking Your Own Sourdough
There’s something deeply satisfying about baking your own bread. It’s not just about the end result, although that’s certainly delicious—it’s about the process. It’s about taking a few humble ingredients and, through time, care, and a bit of patience, turning them into something extraordinary. Every step of making sourdough bread, from mixing the starter to shaping the dough, is an act of love. And every loaf is a little slice of that love.
If you’re new to sourdough baking, don’t be discouraged if things don’t turn out perfectly the first time. I’ve had my share of missteps (and I’ll probably have more!), but that’s the beauty of sourdough: each loaf teaches you something new. And even if it’s a little uneven or the crust is a bit too thick, it’s still going to be delicious. It’s all about learning and enjoying the process.

A Few Tips for Sourdough Success
-
Patience is key: Don’t rush the fermentation process. The longer you let your dough rest, the better the flavor.
-
Flour matters: I love using high-protein bread flour, but you can experiment with different types of flour to create different textures and flavors.
-
Keep your starter happy: A strong, healthy sourdough starter is the heart of this recipe. If you’re not sure how to care for your starter, check out my blog post on getting started with sourdough for tips on maintaining it.
Join the Sourdough Baking Community!
I hope this simple sourdough bread recipe inspires you to get into your kitchen and start baking! There’s nothing quite like the satisfaction of pulling a loaf of homemade bread from the oven. If you try this recipe (or have any tips of your own), I’d love to hear about it! And remember, baking bread is about more than just following a recipe—it’s about enjoying the process and sharing that joy with others.
For more sourdough tips and goodies, check out my online shop, where you’ll find everything from sourdough starters to cozy aprons. Happy baking, friends!